Wednesday, December 21, 2011

BURNT ONION GRAVY, and the nature of stocks and roux

Is Burnt Onion Gravy really made from burnt onions? And if it is, how the heck does that work?

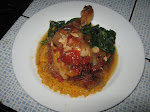
A perfectly viable question and one made even more real to me when I posted a picture of a recent batch of the aforementioned gravy on my Facebook page and a friend asked, "So, was this a a mistake that you had to throw away?"

I explained to her, as gently as I could, that no, it was not a mistake, and that it was, rather, the name of the sauce/gravy. I also felt that I should mention, that I rarely posted pictures of my cooking errors on Facebook, although once I thought about it, the notion kept me rather entertained.

And so it struck me that perhaps I might write a bit about the nature and history of this Burnt Onion Gravy (from hereon out known as BOG), but also take the opportunity to discuss stocks and roux and how they go together to make sauces and yes, gravies. It does take a plan and a pretty good recipe as well to make something with the word "burnt" in the title taste good and I'm going to tell you how to do it.

I learned to make BOG from a friend and mentor, Philipe LaMancusa, while we were working in what was, at the time, a very hot San Francisco restaurant called Embarko. Philipe is, along with being a man who has a very real feel for food and what makes it taste good, also a man with a droll wit and a good vocabulary. We had dishes on our menu with names like "Jamaica Mistake?" (for a jerked pork dish), and fish dishes described as being served "with a squeeze and a pat" (lemon and butter, natch).

BOG was a the sauce that went on a pan fried pork medallion dish that passed through our menu for a brief while. The dish came and went, but the sauce, it's composition and, of course, its name, lingered with me right up to this very day. This sauce is the very essence of a series of ingredients coming together to make a huge flavor with the use of some classic and some not so classic cooking techniques (and a little imagination).


So let us leave this amusing story and its colorful folk, and talk about sauces and stocks, and what gives them the flavors that make one better, or at least different than, another. Really, what this is all about, and what I seem to write about more than almost anything, is FLAVOR. How to capture it; how to enhance it, and how to bring it out when it seems most elusive.

The first building block of flavor, not only in this particular recipe, but in so many, many more is the making of stock. In this case we're talking chicken stock. I know all of you are nodding your heads in abject boredom and saying, "yeah, yeah, yeah, Chef we know all about chicken stock", but none the less, at the end of this I will provide a recipe for chicken stock (the way I do it) and for everything else that we discuss in this particular blog post.

In the interest of creating and building flavor, however, we are going to take our chicken stock one step further and make chicken stock squared, or, "dark chicken stock". This richly flavored dark chicken stock is some killer stuff and can be used to bump the flavor level up in a great many of things you cook. It's a simple enough process, too, it just requires patience.

What you need to make this liquid gold is take all the ingredients you would put in your first chicken stock (which you need to have already made and cannot make this second batch correctly without), that is to say, bones, mirepoix, spices, etc., and put them in a roasting pan in a hot oven (400) until the are nicely browned and caramelized. You will then pull them from the pan, put them in a stock pot, deglaze the pan with a cup of two of your previously made chicken stock (taking GREAT care to really scrape up all the good browned bits off the bottom) and pour that and the remainder of your first batch of chicken stock over the nicely browned bones and veggies.

Got it? Now cook it like you cooked the first batch of stock and you will be amazed at the results. What you get by the time you have cooked it for several hours, strained it and refrigerated it so that the fat congeals on top (for easy removal), is a dark, rich and extremely flavorful nearly sauce-like stock that will bump up the flavor of anything to which you wish to add it.

What we are going to add our dark chicken stock to in this recipe is a roux that is made from the oil that a batch of onions have been cooked in until they are just past the point of caramelization and are definitely crunchy, if not exactly "burnt". Got that? Onions, oil/butter, flour. A roux, you say, you ask, you posit; isn't that just flour and oil mixed together to thicken something? Yes, I say, true indeed, but more than just being a thickening agent, a carefully cooked roux can influence, carry and change the flavors of sauces and soups to which it is added.

Roux was invented by the French and used, yes, almost exclusively as a thickening agent. In the French kitchen it is rarely cooked past a point of pale blonde and only then so that it will blend more easily and not separate in the liquid to which it is added. In fact, beurre manie, used to thicken a number of sauces, is merely softened butter and flour mixed together and never cooked at all.

There is some evidence of darker roux in some Swabian dishes of Southwest Germany, but it was the Creoles and the Cajuns in Louisiana who originated long cooked dark roux and created the dishes in which a dark roux would become flavoring agents rather than just thickeners. Gumbo, of course, and etoufee for another, are dishes in which the long cooked roux takes on a nutty subtle flavor that becomes an undercurrent in the final flavor of the dish.
Additionally, as the roux is cooked and the flour begins to change color, it loses much of its glutinous characteristics and becomes more a flavoring agent and less a thickening agent.

Now that we have our dark chicken stock and an understanding of roux, we can return to the cooking of our BOG and that starts with onions; lots of them, thinly sliced. For a batch of this gravy that will use 1 Qt. of dark rich chicken stock, use 5-6 large yellow onions. These onions will get cooked in a heavy skillet with high sides first in just oil and later with butter added until they begin to brown (the full recipe for this will appear at the bottom of this blog). The onions will, of course, have to be stirred, but not so frequently at the beginning as at the end.
While the onions are browning, bring the dark chicken stock up just short of a boil and hold it on a low flame so it stays warm.

Start the onions in the oil, but once they have begun to take on a nice golden color, add the butter to hasten the browning process. Now you will have to watch them closely because the whole butter that you are adding contains milk solids that will brown (and even burn) very quickly. I use a wooden spoon for stirring the onions so that I can easily scrape them off the bottom as they begin to stick and become darker and crunchier.

And at last you will notice the thinner of the onion strands beginning to look dark, short of black, but definitely becoming darker. They will try to stick to the pan but be diligent; keep stirring, but watch them very closely, you are almost at the point where they will need to be removed from the pan. As we move beyond caramelization into a cooking to crispy of the onions, reduce the heat under the pan and remove them to a colander placed over a bowl using a slotted spoon. Some of them should be decidedly crunchy and nut brown to nearly black.

Now you have a heavy pan with onion flavored cooking oil and it's time to build the roux. Classically, a roux is made with equal parts of flour and oil, so if you have used two ounces of oil (plus a bit of butter) add two ounces (and just a bit more) of flour to the pan, turn the flame back on fairly low and whisk the flour into the oil in the pan. At this point, also, pour the drippings from the drained onions back into the pan.

The flour should immediately pick up a bit of color from the cooking oil and will be a muddy kind of brown. Keep whisking it in the pan over the low flame and you will notice two things about it. You will hear it beginning to cook, but you will also start to feel it cooking, as it will begin to thin a bit in the pan and will whisk more easily. This is an important part in the development of the roux and it means the flour is cooking in the roux, the glutens are breaking down and the roux MUST be kept moving in the pan; not fast, not necessarily briskly, just moving, always moving.

And now the roux will begin to become seriously brown, first to a color nearly like peanut butter and then closing in on chocolate. This is the all critical moment. It is time to add the stock to the roux. This is thrilling, but a bit dangerous, so it is important to do two things (once again): Add the stock to the roux slowly with a ladle waaaay over to one side of the pan, and; whisk continually on the side of the pan away from where the stock is being added because it will spatter. The sauce will thicken immediately with the addition of the first ladle of stock, but keep ladling and whisking until all the stock is incorporated. Now and only now, raise the heat below the pan and bring the gravy up to a slow boil.

Now wasn't that fun? You're almost there. You've mastered dark roux and you should have a deep rich brown (and slightly thick) gravy simmering in the pan. Pull the pan over to one side of the flame and once it is at a low boil, lower the heat again, stirring as you do. As the liquid bubbles on one side, it will push the impurities in the gravy to the other side and you can skim them off with your ladle. Add the onions back to the pan and now you have everything in your BOG. Allow it to continue to cook on a low heat for up to half an hour, but at least for 15 minutes, stirring it occasionally and skimming it as needed.

Check your gravy for salt and add it if you like. I like. And I also like to add a dash or two of hot sauce, a little bit of L&P (Worcestershire Sauce) and pepper. This gravy is great to use right now, but will refrigerate (and freeze) quite nicely. When you bring it back to heat (particularly if you have frozen it) you can add a third volume of water as the gravy will have become very concentrated and rich in flavor. I serve this gravy over roasted pork loin, roasted chicken breast, or I add it to soups and stews. It is also wonderful poured over a big bowl of garlic mashed potatoes. Now there's comfort AND flavor in a bowl.

BURNT ONION GRAVY

5-6 Large Yellow Onions, thinly sliced
2 oz. Canola Oil (or other light cooking oil)
1/2 Stick Unsalted Butter
3 oz. Flour
1 Qt. Dark Chicken Stock (hot)
S&P to taste

In a heavy and high sided skillet heat the oil and add the onions. Cook the onions over medium heat stirring occasionally, until they begin to turn a golden brown. Add the butter and keep cooking, stirring more often as the onions darken.
As the onions begin to take on a very dark color and change texture from soft to crispy, lower the heat to as low as it will go, and lift the onions from the pan with a slotted spoon and transfer them to a colander placed over a bowl.
Add the flour to the pan along with the juices from the onions and whisk until a paste forms. Raise the heat slightly and cook the roux until it begins to turn first the color of peanut butter and then reaches a shade just short of chocolate.
Very carefully ladle the stock into the roux, whisking continually. Keep adding the stock until it is entirely incorporated. Raise the heat again and, stirring continually, bring the thickened gravy to a low boil. Move the pot to one side of the flame, lower the heat (while still stirring) and allow the gravy to simmer. Skim what ever foam comes to the top and return the onions to the gravy. Allow to cook for 15-20 minutes and check for seasonings.

BASIC CHICKEN STOCK

5# Chicken Bones, rinsed in cold water
2 Large Carrots, cut in discs
2 Yellow Onions, cut in large dice
4 Stalks Celery, cut in 1/2" pieces
2 Heads Garlic, cut in half equatorially
2 Leeks, sliced in thin rings (optional)
Stems of one bunch parsley, rough chopped (optional)
5 Bay Leaves
1 Tsp Dried Thyme Leaves (or 7-8 stems of fresh thyme)
12-15 Whole Peppercorns
1 TBS Salt

Place bones and vegetables in a stock pot and cover with 6-8 quarts of cold water. Bring to a rapid boil and then reduce heat to a simmer. Skim foam from top of pot. Add spices and return the liquid to a boil. Once it is boiling, reduce it to a simmer and move the pot so that only one side of it sits over the flame and the liquid makes a small bubble up one side of the pot (this allows a film to form over the top of the liquid, trapping the flavor, rather than cooking it away). Cook slowly, maintaining the bubble at the side of the pot for 5-6 hours, replenishing water if it drops below the level of the chicken bones. Do not stir or mix the stock once it as this point!!!
Strain the stock carefully and refrigerate, taking care not to agitate the liquid. Allow stock to cool overnight and when ready to use, remove fat from top.


Wednesday, December 7, 2011

Purple Hulled Peas

I lived in Austin, Texas for a year and in that time became awfully fond of fresh field peas. Butter beans, crowder peas, lady peas, creamer peas, even black-eyed peas; these are all part of this family of peas, taken fresh from the field in their hulls, and traditionally cooked with a pork product, some broth and veggies. Yes, they are called "peas" and yes, for the most part, they more resemble "beans" in their dried form. Most of the field peas I have cooked are oblong, like a bean, and have that telltale dark (if not black) eye, off to one side of their center.

Of course, it's easy to find the dried version of these in a lot of stores and some of the specialty markets will even carry the more obscure varieties. But really, there is no substitute for the freshness of flavor of these peas when they are cooked right out of the hull. And my first admission, right from the get go here is that is not what I did, or should I say, not what I am doing, because the pot is simmering away even as I type. I am cooking purple hulled peas that my sister Barbara, who lives in Austin, was kind enough to bring me (in their frozen form) on her most recent visit a few weeks ago.

Most of the articles I've perused on the internet tell me that field peas are the sure sign in the South that Summer has begun. But it appeared to me, while I was living in Austin, that there are a number of varieties that produce well into the fall and it would seem that purple hulled peas are one of them.

One of the great delights of cooking field peas is one that I experienced as well in Costa Rica when I cooked frijoles tiernos (translated as, "tender beans) which are also fresh from the hull. They cook in an amazingly short period of time. While the frijoles tiernos took a whopping 35-40 minutes to cook (because, after all, they were real beans) my purple hulled peas have cooked to a lovely tenderness in the time it took me to write these rambling paragraphs. So now all I have to do is turn the heat way down and let them slowly simmer and marry their flavors with the ham hock I took from our Thanksgiving feast, the chunks of homemade chorizo I used and the aromatic vegetables and spices. And yes, the house is filled with the smell of the cooking soup mingled with the smell of burning oak from the wood burning oven. Take that freezing weather!!!

PURPLE HULLED PEA SOUP/STEW

1.5# Bag Fresh or frozen Purple Hulled, or any field, Peas
1 Big Yellow Onion, chopped
2 Carrots, cut in medium dice (1/2" X 1/2")
2 Stalks Celery, cut in medium dice
6 Cloves of Garlic, smashed and chopped
1 Meaty Ham Hock
1 Spicy Smoked Sausage (chopped)
1 TBS Bacon Fat or a (sigh) canola oil
2 Bay Leaves
1/2 Tsp Dried Thyme (or 2-3 sprigs of fresh)
1/2-1 Tsp Louisiana variety spice mix (I use Kitchen Witch, produced by a friend of mine, but you could use any blackening-type spice mix, I suppose
32 ounces Chicken Stock, boxed broth or water, plus 1 Cup Water

I use a heavy cast iron dutch oven to make this in, but any heavy sauce pan will work.

Heat the pan and add the bacon fat and the chopped sausage. Simmer them until the sausage begins to color and is yielding its fat.
Add the chopped vegetables, the dried herbs and the spice mix. Stir and cook over medium high heat until the vegetables begin to wilt and give off an aroma.
Add the peas to the pot along with the ham hock and cover with the broth and water.
Bring the soup/stew to a slow boil and then turn it down to simmer for 20-30 minutes until the peas are tender. At this point I like to turn the heat down to the lowest simmer and let the soup/stew sit on low heat to allow all the flavors to marry into absolute deliciousness. This will be good today, better tomorrow and better still the following day. And it freezes quite nicely.

Monday, November 21, 2011

SHORT RIBS; or, Heading Into Winter in a Big Hurry, Slowly

Short Ribs; or, Heading Into Winter in a Big Way, Slowly

Are short ribs the answer to the pre-winter blahs? Well, on a deeply economic, sociologic and psychic level perhaps not. But cooking and subsequently consuming a batch of short ribs certainly can be good for what ails you. It can warm your kitchen and your belly and your heart, and it can give you a little of that free time that you need to read or go for a walk while it is in one of its long developmental processes.

This recipe is all about braising and I love to braise. I am a braising fool. I braise beef, lamb, pork and even chicken and duck. I am smitten by the way tough cuts of meat are rendered mouth wateringly tender by a long oven bath in herbs and wine and vegetables.

Short ribs represent to me the pinnacle of braising and braising is all about steps, or processes, if you will. The rewards, that culinary pot of gold at the end of the rainbow, is, to me worth the steps. But I tend to like the steps along the way as well. I cook for a living yes, and it helps me to just barely pay my bills, but I also cook because the process makes me feel good. The acts of food preparation beginning with the procurement, through the chopping and searing and all the way up to forking that first bite into my mouth are all part of the reward I get when I cook.

Short ribs are cut from the rib and plate primals and from one end of the chuck so tender all on their own, they ain't. Short ribs are generally cut into either English or "Flanken" cuts which involve the fatty but meaty heavy end of the ribs being cut into 1 1/2-2" sections. There is also a Korean cut of short ribs, but it involves the ribs being cut into long ribbons of meat and bone and isn't what we're talking about here. Short ribs are held together by intercostal muscles and a lot of tendon and what that means to us, the cooks, is that they will need to be cooked for a long time to break down all that connective tissue and render the meat what we know as "fallin' off the bone tender".

Braising is essentially two cooking methods in one; dry and wet heat are both used. First the meat involved is browned in a pan to provide that caramelization both on the meat and in the pan that provides a strong burst of flavor. Secondly the meat is entirely, or partially, covered in a rich liquid and cooked slowly in the oven so as to break down those collagen holding connective tissues and turn them into a deeply flavored gelatinous sauce.

Okay, enough science talk; let's cook. Well, no, first let's shop. I look for short ribs that are cut about an inch and a half and are not too overly fatty (this is sometimes just not possible). If you need to go to the butcher to order them a day in advance, remember, this is all just part of the process. It used to be, perhaps 20 years ago, that short ribs were something the butcher would beg you to take off his hands, but, as with all cuts of meat "rediscovered" by the foodie revolution this is no longer so. I just paid $2.99/# for some short ribs I thought were pretty nicely cut and trimmed, so you might want to use that as a bench mark (or not).

Something to note as well, AND THIS IS IMPORTANT, before beginning, is that this is not a recipe for a dish you are going to eat the first day it comes out of the oven, and if I had my way, you would not even eat it on the second day. Short ribs will taste their best after 48 hours of refrigeration have allowed them to "settle in" to their sauce, open up a bit, and absorb the cooking liquid.

Braised Short Ribs ala Chef of the Jungle

3# Beef Short Ribs, cut 1 1/2" (two good pieces per person will suffice)
1 Bottle Red Wine (as good as you feel comfortable cooking with)
1 Onion, cut in medium dice
1 Medium Carrot, cut in 1/2" dice
1 Parsnip, cut in 1/2" dice
1 Turnip, cut in 1/2" dice
6 Cloves of garlic, smashed and chopped fine
3 Bay Leaves
4-6 Sprigs of Fresh Thyme
2 Oz. Cooking oil
2 Cups of Chef of the Jungle Roasted Tomatoes (see other posts), or, 1 14 Oz. can of chopped tomato product
1 Qt. (this may be excessive) of Homemade Stock or, broth from a box

The first thing I do is season the short ribs with a good hit of sea salt and black pepper and then I sear them. There are two way to go about this searing process (yes, another process); the first is to sear them on the stove top in a heavy dutch oven or whatever vessel you plan to do your braising in. This works nicely, although I am not a big fan of the splattering grease involved. The second method, and the one I prefer, is to heat the oven to 400 degrees or so and put the short ribs in for about 35-40 minutes or so. You may want to turn them once.

There are two things you are hoping to accomplish by doing this. The first is that you want to render away some of the fat that coats the outside of your ribs. There can be a lot of fat. The second (and to me, more important) thing you're trying to accomplish is to get the ribs to brown and stick to the pan. That stuff that sticks to the pan (the French call this the "fond") is the source of a tremendous amount of flavor.

And now we are going to deglaze; ready? You will need red wine. When your ribs have gotten a nice brown color and they are sticking to the bottom of the pan, remove it from the oven, move the ribs to a plate, pour off the fat and put the pan on a lit burner. When the pan begins to sizzle and pop pour in about a cup of red wine and start scraping. Reduce and scrape for about 30 seconds or so until you have gotten all the good bits off the bottom of the pan. Pour your "fond" off into a cup or bowl.

Wipe the cooking pan clean (relatively speaking) with a towel and heat the cooking oil up in the pan. When it is hot, add all the vegetables (with the exception of the tomatoes) and let them saute. Go ahead and stir them around a little, but you want them to stick to the pan a bit; vegetables have flavor, too, you know. When the vegetables are starting to brown add the second half of the red wine and stir up whatever has stuck to the cooking pan. Let the wine reduce by half and add the tomatoes, your prized "fond" from the meat deglazing, and the herbs. Stir to mix, then return the short ribs to the pan, nestling them down into the vegetables. Add 2-3 cups of the stock, or enough to nearly cover, but not quite cover, the ribs.

Return the whole pot, uncovered, to the oven and adjust the heat to 35o. And now, get out of here. Got take a walk, read, make love, do something that will take your mind off the masterpiece that is beginning to form in your oven. In an hour come back and take a look. The tops of the ribs should be browning, so turn them over to get more of that brown flavor into the sauce and return the pan to the oven for another hour and a half. If the liquid has reduced to the point where over an inch of the ribs are showing, add a bit more stock. And remember, relax, this is a process, I told you that.

After two and a half hours, take the pan from the oven, put it on a cooling rack or a trivet and let it come to room temperature. When it has cooled down sufficiently, cover it and put it in the refrigerator and just walk away. The next day, when you take a look, all the fat will have hardened into a reddish (this is from the tomatoes) layer over the top of the pan and you will be able to remove it and dispose of it quite easily with your fingers, or, if you're just that way, a spoon.

Now at this point you can reheat the short ribs (very very slowly, please) and serve them and their amazingly rich sauce over buttered noodles (Chef of the Jungle's favorite), risotto, polenta, or any of the mashed root vegetables, solo or mixed (I am particularly fond of celery root and yukon golds). It will be wonderful, ethereal, comforting and just the very thing for a chilly evening. BUT, and I tell you this in all sincerity and seriousness, if you can wait another day, it will be SO much better. Really, trust me on this. It's all about the process.

Thursday, November 17, 2011

Enchiladas Verde

This week I followed up the roast chicken from my previous blog by picking the carcass and turning he leftovers into Enchiladas Verde. Verde is, of course, Spanish for green and the green for the enchiladas refers to the sauce and the sauce comes from tomatillos. Tomatillos, oddly, are not at all related to tomatoes, but are, rather, in the gooseberry family as their little husks may indicate. And, as luck and seasonality will have it, this is harvest time, at least in this area, for tomatillos.

The tomatillo has a bright, slightly acidic flavor and is a wonderful foil for the richness of the melted cheese, sour cream, avocado and all the things that make enchiladas a wonderful and perfect winter meal. And while I made these particular enchiladas with chicken as the main part of the filling, I absolutely LOVE this sauce with Dungeness crab enchiladas, a seasonal treat in my family for years.

My friend Lynda Lee Wieland, who used to pick me up hitchhiking in Costa Rica while she was VERY pregnant has been kind enough to ask for this recipe. So, Lynda, here we go.

ENCHILADAS VERDE

For The Sauce
12-15 Ripe Tomatillos
1 Jalapeno Chile
1 White Onion
3 Cloves peeled Garlic
1 Anaheim or Poblano Chile (optional)
1/2 bunch cilantro

Husk the tomatillos, and rough chop the other vegetables. Cover all of them with water (except the cilantro) and bring to a low boil. Cook for about ten minutes or until the tomatillos are tender. Using a slotted spoon transfer the cooked vegetables to a blender, add the cilantro, and pulse (careful, this is hot) until you have a smooth sauce. Save the cooking liquid in case the sauce seems too thick. Pour 1/4 of the sauce into a baking dish or casserole large enough to hold 12 enchiladas

For The Filling

2 Cups Cooked Chicken
1 Large White Onion, cut in strips or half moons
2 Large Anaheim Chiles cut in strips
1 Poblano (Ancho) Chile cut in strips
1 Oz. Canola oil
1/2 Cup Chicken Broth
1/2 Bunch of Cilantro, rough chopped
2 Ripe Avocados, cut in strips
1# + 1/2# Grated Monterey Jack Cheese
4 Oz. Softened Goat Cheese (this is my secret ingredient and is, of course, optional)
12 Corn Tortillas

Preheat your oven to 350.
Heat a skillet with the oil and saute the onions and chile strips until just soft. Add the cooked chicken and toss to mix. Pour in the chicken broth and allow to come to a simmer. Heat the chicken and vegetables just through and add the cilantro.
Heat a second heavy skillet and heat on tortilla on both sides until it softens. Put in two tablespoons of the chicken filling, a sprinkling of grated jack cheese, a little dollop of the goat cheese and two avocado slices. Carefully roll the tortilla around the fillings and place it in the casserole. Do this with the remaining tortillas and filling taking care to make sure you have just enough of everything left at the end. Pour the remainder of the Salsa Verde over the rolled enchiladas and top with the second part of the grated jack cheese.
Bake the enchiladas for 30 minutes covered with aluminum foil. Remove the foil and bake for another ten minutes. Serve carefully and with love, topped with sour cream and more avocado.

Wednesday, November 16, 2011

Brussels Sprouts; Somebody Likes 'Em

The other day I stopped in at one of our local farmstand markets and there on a long low table were giant wands of green; full stalks of brussels sprouts in their natural state. And I, of course, had to buy one, a nice full one, nearly three feet long, with sprouts both small and large.

Brussels sprouts are one of those classic things you either love or hate. There is very little middle ground when it comes to them. And the faces people make to express their dislike for these cute little round members of the brassica family are among the classics in the annals of food dislike.

I happen to like brussels sprouts, but it wasn't always so. In my household when I was a child, they were, like most vegetables of the 50's, cooked into a grayish mush that guaranteed that no child alive could or would like them. I am sad to say that in this particular era in food history my mother took similar approaches with zucchini, asparagus and anything else green from the garden. Fortunately her tact changed as he children grew.

Recently I have cooked brussels sprouts two different ways that were well loved in our household and not just because the both involved the contribution of bacon or pancetta, although it never hurts, does it? These are both incredibly simple recipes. The first involves shredding the sprouts as if one were making mini-cole slaw out of mini-cabbages and sauteing them; the second just calls for them to be halved, but then roasted. Try either of them with pork or chicken on a chilly Fall evening.

Shredded Brussels Sprouts with Pancetta

2o Brussels Sprouts; halved and then sliced thinly
3 oz. Pancetta; diced fine
1 oz. olive oil
S&P to taste (but I like a lot of black pepper on my brussles sprouts)
Water or chicken stock

Heat a heavy saute pan over the flame and add the olive oil and pancetta. Cook until the pancetta begins to crisp slightly and throws a bit of oil. Add the shredded sprouts and toss with the liquid in the pan until they begin to wilt slightly. Add about two ounces of water of stock to the sprouts and toss again. Cook for a minute or two until the liquid is nearly absorbed and serve.

Roasted Brussels Sprouts with Bacon

20 Brussels Sprouts, halved
2 Thick slices of smoked bacon cut into 1/2" pieces
S&P to taste
Water or chicken stock

Pre-heat the oven to 400 while you are halving the sprouts. Put the cut bacon into an oven proof saute pan and add the sprouts. Cook in the oven until the bacon begins to render, then toss to mix. Return to the oven and cook until the bacon is almost cooked through. Add an ounce or two of water or stock, toss and return to the oven for another three or four minutes.
The sprouts will have lost a bit of color, but are, at this point, ready.


Sunday, November 13, 2011

Roast Chicken Redux

The last time I wrote about Roast Chicken and the very act of roasting a chicken, the circumstances were significantly different. I was living in a house at the edge of, or perhaps right in, the jungle on the south Pacific coast of Costa Rica. The weather was tropically gorgeous; and the doors (doors? We had doors?) and windows were all open so that the sounds of the birds and the noises from the early evening habitues of the jungle were a soundtrack for the browning of the bird. I was wearing shorts, perhaps a light, and if so, unbuttoned short-sleeved shirt, and I was definitely, very definitely barefoot.

I wrote about the gently meditative quality that roasting a chicken offers to one's existence, even in a nearly equatorial environment. The simple act of seasoning the bird, placing into the hot oven and then drifting away into a book and some jazz was as close to cooking serenely as I could possibly imagine. The rich and comfortingly familiar smells of roasting chicken, coupled with the gentle sounds of a jungle evening were, at that time, the very definition of comfort.

This afternoon, one in which the sun is already so far gone it feels like evening, I am preparing another bird for roasting. But this is Oregon. And more specifically, Fall on the Eastern side of the Willamette Valley; right up against the slopes of the Cascades. The temperature is in the low 40's and the birds have all hit the skies for the south. The colors of the trees, at least the ones that are still in possession of their leaves, are golden, scarlet and rust made all the more striking by being set against the dark green of the firs.

In Costa Rica, I kept the accompaniments simple, not really much in the Roast Chicken canon goes with the tropical weather, and in truth, a good deal of the chicken ended up served over a neighbor's lovely creekside grown watercress. Here, I've got the weather on my side to create the full-on roast chicken experience. I've got a stalk of locally grown brussels sprouts and smoked bacon. I've got fat golden potatoes and pungent heads of garlic from our own gardens. And best of all, I've got a supply of rich chicken stock for the gravy that should so rightfully come from the pan once the chicken has vacated it.

I still have the jazz, oozing and snaking from the speakers, but this time the music wafts up into the smell of the smoke from our wood burning stove (not to mention the early scents from the chicken arising from the oven). The fading light from the jungles has been replaced by a wonderful steam on the windows and rather than easing into a cooling jungle evening, we are cozy and warm here in our wooded house on a cold Fall night. Best of all, I am not alone for this roast chicken, and it is SO much better to have someone with whom to share such a simple but basic realization of pleasure and yes, comfort.

Tuesday, November 8, 2011

TASTING; Or, How We Sell From the Kitchen

One of the interesting (to me, anyway) and occasionally entertaining things I do in my job as Chef of a catering company, is present tasting meals/plates to prospective clients. Recently I've had the occasion to present two of these meals, which in many ways, demonstrated the differences in the way these mini-events can go.

Over the last several months in my new-ish position, I have written numerous menus representing the different seasons, different price points, different styles and blends of all three. Generally our prospective client will take a look at these menus and make some choices that appeal to them. Or, they will say, "We want a simple menu that is going to appeal to everyone, including Uncle Ralph, Aunt Maxine, and all the scampering children". There are also times that they will have some very strong ideas of their own about what they want for their blessed event. We, being caterers (and wanting their business), will, of course, bend over backwards to accommodate their needs.

Last Friday we did a tasting for the parents of a Salem woman who had just flown in from Chicago (where, incidentally, it was warmer than it was in Salem). We encountered some interesting problems in feeding them their "tastes", in that they were in the middle of a feeding frenzy that had begun over in the Willamette wine country town of Dundee for lunch and was going to carry on into dinner. Our tasting with them fell somewhere in the middle of "full" and "overload".

Additionally I was faced with the interesting task of presenting a tasting of summer foods for what would be a summer wedding in the middle of a late Fall afternoon when it was 38 degrees in downtown Salem. Our guests wanted to taste a grill-smoked salmon in a summery sauce of roasted red peppers and sweet grilled corn; gnocchi (?) in that summer style "Caprese", with heirloom tomatoes, garden fresh basil and mozzarella; and, oh yes, a "Classic Ratatouille" of summer vegetables.

Through the miracle of West Coast markets, clever freezing a few months ago and my "find" of a farm stand that had the last of their heirloom tomatoes still hanging around, I was able to put out two plates, one for either parent, of the three items requested. But they would be going to dinner in just over an hour, and had eaten lunch late. They choked down a few bites, decided it would be all right for their daughter's wedding and asked a lot of questions about how the meal would be delivered, whether or not it would be cooked on site and how it would be served. But they did agree on the menu.

My second tasting was two days later with a "plate" time of noon on a rainy Sunday morning. It was chilly once again, and wet as well, but this menu was one that fit perfectly into the season. I would roast filets of local fresh salmon and serve it with a Pommery (grainy) mustard beurre blanc, to be served with local wild rice. There would be a bacon wrapped roast chicken breast served with a wild mushroom cream sauce. And lastly, Pinot Noir braised short-ribs. The second and third entrees would both be served with a celery root-yukon gold puree. This was food after my own heart which worked out perfectly, as this was a menu I had written.

I soaked the wild rice the evening in advance so that it would be ready to cook when I arrived in the morning and decided, since wild rice is a little daunting (not to mention one dimensional) on its own, to serve it half and half with barley. I love the combination of the grass and the grain. I also browned and braised the short-ribs with the wine, onions, lots of garlic, carrots and parsnips the night before. They would be so much better after having rested in their braising liquid overnight.

I had picked up some beautiful and huge chanterelles from a forager in Silverton, the town nearest where I live, and the first thing I did when I arrived Sunday morning was to cut them in thick slices and saute them slowly with a big chunk of butter. I cut a couple of branches of fresh thyme from one of our herb pots and added them to the saute pan; thyme throws in a nice subtle flavor in combination with the chanterelles.

Next I peeled two gnarly knobs of celery root and a couple of yukon gold potatoes. I cut them into 2 inch cubes, put them in salted water and quickly brought them to a boil. It occurred to me that I probably would need a bain marie to hold the puree, the rice/barley mix and the sauces until my tasters arrived, so I boiled water and poured it into a 4" hotel pan. While this was heating I put the pan of short ribs in their sauce into the oven to bring up to heat slowly. They already had that "fallin' off the bone" look to them.

I seared off the chicken breasts and wrapped them with partially cooked bacon strips and I cut the salmon into five ounce filets. By this time the potatoes and celery root had become tender so I mashed them with butter and added some cream and a pinch of salt. I love the flavor of this puree and I equally love how easily it comes together. I scooped the puree into a small stainless insert pan and placed it into the bain marie with a bit of clear wrap over the top to keep it moist.

I started the beurre blanc by reducing a cup of sauvignon blanc along with a splash of apple cider vinegar and a drop or two of sherry vinegar. Normally I would use a vinegar with a bit less character, but since I was going to flavoring the sauce with the Pommery mustard, I wanted it to have enough body to carry the flavors through.

Once the wine had reduced to practically nothing I added a dash of heavy cream and reduced that to the bottom of the pan before adding the chilled butter, a couple of chunks at a time. I stirred in a couple of teaspoons of the mustard, checked the flavor and added the sauce to a container in the bain marie.

Our guests were due to arrive at noon so at 11:45 the chicken and the salmon joined the short ribs in the oven. I got out three of our square white plates (the better to show the colors of the food) and laid them out. The call came down that only the woman guest would be joining us. It turned out that her boyfriend/fiance was working nearly 24 hours a day during the grape harvest and had chosen to sleep in rather than eat. Understandable.

I plated the food, angling the salmon up onto the wild rice/barley mix with a spoonful of the beurre blanc over it; dolloped the puree on two of the plates and then arranged the chicken with it's fat slices of chanterelle and the short ribs and the chunks of vegetable on top of the yellowish puree. Scott, my boss's husband was watching me with his eyes wide open and I said, "Just like food porn" to him as I took pictures of the arranged plates and he could only nod.

I arranged the plates on the table in front of our client and loved her reaction to the way the food looked (and smelled). "My fiance is going to be SO sorry he missed this" were the first words out of her mouth. I did my brief spiel and went back downstairs to clean up. It turned out the second words out of her mouth (after she had taken two bites of the salmon) were, "Where do I sign?" And that's the way it's supposed to work.


Thursday, October 27, 2011

Fall Flavors at Lunch

This week I was called upon to cook a special lunch for the owner of Willamette Valley Vineyards.  It seems that the relationship between the catering company I work for and the Winery has become a bit tenuous and some derision had been cast in our direction regarding the quality of the food we had been serving there.  And that was where I came in; new chef, new guy, new ideas, new food.

I have been creating a few seasonal menus for Jean, the owner of Willabys, and she in turn has been sending them out to prospective clients.  And so it was with restrained joy that when the menu for the aforementioned luncheon came into my hands it was one that spoke particularly and directly to my affinity for the flavors of Fall.

The salad was not such a seasonal choice, but still a good one:
 Grilled and Chilled Hearts of Romaine w/Shaved Asiago, Toasted Almonds and Green Goddess Dressing

  I first saw romaine hearts grilled in Berkeley by Chef Daniel Malzhan at the Dakota Grill in the late 80's and have hung on to it as an effective treatment of the oft boring crisp head of romaine for lo, these many years.

  The head is cleaned, halved, brushed with olive oil and simply grilled, cut side down, until the innermost leaves brown and wilt slightly.  It can then be rechilled until serving.  I love shaving rather that shredding the cheese; the long sheets of Asiago lend a fine architectural and dimensional look to the salad.  The sliced, skin-on almonds get toasted for crunch and texture and then there is the Green Goddess Dressing.  While none of that is the essence of "Fall-ish", at least if felt like Fall when I went outside, fired up the grill put the proper markings on the lettuce halves and the leaves swirled.

Green Goddess is a dressing on the rebound these days.  It was devised in San Francisco in the 20's by Chef Philip Roemer to celebrate a play that was passing through the City, named, appropriately, The Green Goddess.  It is mayonnaise based, which may explain it having fallen from fashion for a time, but it is, when laden with the proper and fresh green herbs wonderfully zesty.

The classic recipe calls for a mince of chervil, chives, tarragon, black pepper and the all important capers and anchovy to be blended to the (presumably) homemade mayonnaise, but turns and twists on the original can be taken.  I like to add both parsley and green onions (chives not being as readily available on a daily basis in our part of the world) and I occasionally have been known to substitute basil for the tarragon.  In any case, the blend is lovely; rich, green and creamy, particularly with the addition of a bit of sour cream to take the denseness out of the mayonnaise.

The rest of the menu said nearly everything about Fall that I like:
Roast Cider Marinated Pork Tenderloin with Pear Chutney.
Fall Squash Gratin, and,
Braised Greens

I had seen some locally made cider vinegars that had some unusual flavorings, and I thought this might be a nice time to try one out.  I had already made the chutney (see previous blog entry for the recipe) with a fair amount of ginger so I decided to use the one that was ginger flavored to carry through on a theme.  These are vinegars meant for consumption (as a digestif, or health aid, I can only presume), but I figured it would work wonderfully as a marinade, if used half and half with some local apple cider.  I added some shallots, grated ginger and a splash of oil, and poured it over the pork.  I let that sit for 24 hours.

I also wanted to serve the pork with a stock based sauce to both moisten it and make it so the chutney was not the sole flavoring agent.  I had trimmed fat, silver skin and a little meat from the tenderloin before it went into the marinade, and these I browned with some cooked chunks of bacon (I wanted a little smoky/salty thing going on).  Once the meat was brown and the bacon had rendered a small amount of fat, I deglazed the pan with another good splash of the ginger-flavored vinegar and then put in a cup of veal stock.  This I allowed to come to a boil and then I dropped the heat to let it reduce slowly and cooked it down to about half a cup.

The second part of the menu, the gratin, would be fun.  I love making (and eating!) gratins and I hadn't made one with fall/winter squash in some time.  I chose butternut, as it's grown right near us at Lake Labish by Schlechter Farms and has just come off the vine; nothing could be more local or seasonal.

  The first thing I did, naturally, was peel and cube the squash (3/4" if you're measuring) and toss the cubes in a bowl with some olive oil and S&P.  I roasted if for about 20 minutes at 350, just to soften a bit, with some whole cloves of garlic and a dice of onion.  When that came out of the oven, I tossed it with just a bit of heavy cream and some crumbled goat cheese and put it into the casserole.  I made a topping of garlicky bread crumbs, toasted hazelnuts and parmesan and sprinkled it over the top.

My greens selection was a bit limited, Oregon not being a hotbed of Southern cooking, but chard is in season here and I was able to get red and white.  A simple tearing of the leaves off the spines got it ready to cook.  I was ready to come back the next day and take everything to the winery for some "a la minute" cooking.
~~~~~~~~~

 The next day the wind was howling through the Willamette Valley and the winery, perched up on top of the ridge overlooking the Valley was a chilly, chilly place.  The first thing I did upon arriving was crank up the convection oven to get some heat in their open drafty kitchen and popped the gratin in the oven.

I heated a heavy saute pan on the burners with a bit of oil and once it was good and hot I dried off the pork tenderloin and plopped it into the pan, not just to brown, but to caramelize some of that marinade.  When it was nice and crisp on one side I turned it and put it into the 400 degree oven to join the gratin.

I plated the salad, that was easy; I halved the romaine half so it was a quarter, spooned the Green Goddess over and around it, propped the shavings of Asiago up in strategic places and sprinkled the toasted almonds over the top and then put the crostini off to one side.  Nice. That was easy.

While the pork t-loin and the gratin were cooking I heated olive oil in a medium sized sauce pan, added some garlic and when it was just cooked, added the wet (from washing) torn chard leaves.  I sprinkled in a bit of salt and pepper, lowered the heat and covered the pan.  Keeping it simple.

I took the foil top off the gratin to allow the top to brown and took the pork loin out of the oven, covered it with foil and allowed it to "repose".  I deglazed the pork roasting pan with yet a bit more of the ginger-flavored cider vinegar and added the reduction I had made the previous day.  It smelled so good mixing with the caramelized flavors from the pork loin.  And at this point I took the salads to the dining room, introduced myself and served the first course.

Back in the kitchen the chard was nicely wilted and the gratin was bubbling under its crisp topping.  All the was left was to plate it all.  The a nice rectangular slice of the gratin, topping intact, went at the top of the plate and the drained greens in the middle.  I sliced the pork loin into nine nice medallions and arranged them on the three plates in an overlapping curve around the greens.  A dollop of the pear chutney went on the top of the middle medallion and a gentle pour of the rich reduced sauce went around and over and under.  Yes, it was lunchtime.

The table got kind of quiet when I served the entrees, except for one hushed, "Beautiful".  While they ate I returned to the kitchen and plated my All Oregon dessert; half a peeled and sliced (perfectly ripe!) Bosc pair, a sprinkling of Oregon Blue cheese, candied Oregon hazelnuts, and a squirt or two of locally made Oregon blackberry honey.  Such a lovely combination.

When I went back out the plates were clean and I delivered the simple dessert.  That was it, no hanging around.  I packed it up and hied back to the kitchen.  I had to come back that same evening with dinner for 30, but that was another meal and a story for another time.  (And by the way, I heard later that the bigwigs at the winery had LOVED the lunch.)


Friday, October 21, 2011

PEARS PEARS PEARS

Pear season in Oregon; treasured fruit from cultures both past and present. Sensual in ways both culinary and visual; pears are crunchy and suave, juicy and fragrant, luxurious yet simple. They have been prized and cultivated by Northern cultures, primarily because they are one of the few tree-born (apples, of course being the other) fruits that thrive in cooler climates. From Scandanavia, through Northern China (the People's Republic of China is the largest producer of pears in the world) and Japan and across into the Northern states of the US, pears are grown and loved for their versatility.

Although I have grown to love pears, it is something that has happened mostly in the second half of my life, a bit like beets. When I was very young pears meant that either I was hiding from friends in the pear orchards near where I grew up, dodging the rotting, sweetly pungent, yellow-jacket covered fruit as it lay on the ground; or, my mother was serving them from a can, alongside cottage cheese, as an alternative to a green salad next to our dinner. Neither of those experiences did a lot to enhance a childhood love of pears. The part of the East Bay in Northern California in which I spent my youth, the Lafayette-Moraga area, was a prime pear growing region up into the 1950's, shipping thousands of pounds of pears a year back to the East Coast, but property and houses proved far more lucrative. Where there were once thousands of pear trees, there are now hundreds of million dollar-plus homes.


Here in Oregon, the pear is the State Fruit, and while the two main growing regions are Hood River to the north and the Rogue River Valley to the south, here in the Willamette Valley they do produce quite a large crop of the Pear that Oregon is known for, the Bartlett. It is red and green and irresistibly juicy. The Bartlett is a huge canning pear and the one that you see in those Harry and David fruit ads where they advertise "pears so juicy you can eat them with a spoon", or something like that. Fewer, but also wonderful are my favorite, Bosc's; brownish-gold skinned, firm, flavorful, and elegant. The Bartlett has the juice, but the Bosc has the crunch.

It was clear that in doing what I do I would connect with pears on one level or another and it was when I first tasted an ethereal pear-almond tart at Chez Panisse that I realized what I had been missing. And I credit Mark Miller when I worked with him at the 4th St. Grill in Berkeley for showing me the wonders of the Comice pear. But pears remained mostly a pastry item in my world, despite my working with chefs like Bob Kinkead at the Harvest in Massachusetts who introduced me to those damn tiny tasteless Seckel pears that he made us peel and serve with pork.

I finally reached an understanding of how pears could work in savory dishes when I began grilling and roasting them to serve in both salads and alongside meats and poultry. As with almost any fruit of vegetable, the grill serves to concentrate the flavors and/or sugars in pears and kicks their flavor to another level, one that can stand up to the rich flavors in reduction sauces. One of the dishes I created was a Roasted Guinea Fowl Breast with Roasted Pears and Thyme that I served with a rich Sauvignon Blanc-poultry stock reduction sauce with braised greens and soft polenta. The flavors of the pear proved so complimentary to the bird and the roasted stock and really helped to make the dish.

Pears had been off my radar for quite some time while I was in Costa Rica (go figure), although one does see pears from Chile in the markets occasionally. It wasn't until I got a care package from Kathy last winter just before Christmas that had several bags of dried pears in it that I had even thought of them. What a revelation! They were like candy; sweet and chewy, with just enough of that elusive minerally tang that the fruit is famous for.

So this Fall, at my urging (and because her entire family loves them) she has become the Queen of Dried Pears yet again. She has already peeled, sliced and dried an entire lug (42#) of Bartletts and is working her way through a lug of Boscs. I loved the Bartletts last year, but this year realize that the Boscs seem to have even a richer, deeper concentration of flavor. When Kathy gets bored with the drying process she has been vacuum packing and freezing fresh wedges of peeled pear after dipping them in a bit of sweetened acidulated water.

I, on the other hand, am working on my pear chutney recipes, trying roasted, poached and grilled pears for different flavor and texture feels and flavors. I have a tasting this week for a prospective catering client and am going to serve he and his party a cider-marinated pork tenderloin topped with pear chutney. This is the recipe I will use:

PEAR CHUTNEY

6 Bosc Pears, peeled and cut in 1/2" cubes; tossed in lemon juice and sugar;

1 Red Onion, peeled and cut in 1/4" dice
I Red Bell Pepper, cut in 1/4" dice
1 1" piece fresh Ginger; peeled and grated
1/4 Jalapeno Chile, seeded and cut in very fine dice
1/4 Cup Golden Raisins (or for the holiday, Dried Cranberries) plumped in white wine
1 Cinnamon Stick
4 Whole Cloves
Pinch of freshly ground Cumin
Pinch of freshly ground Nutmeg;
1/2 Cup White Wine Vinegar
1/2 Cup Brown Sugar
Juice of 1 Lemon

Bring vinegar, brown sugar and lemon juice to a boil (this chutney base is called a "gastrique") and add all ingredients except the pears. Cook for five minutes, or until the vegetables have softened but not lost their color. Turn off the heat and stir in the cubed pears. Let cool and pack in glass jars. This chutney will hold in the refrigerator for several weeks and is delicious on pork or roast fowl and also on turkey sandwiches (!).

PEAR ALMOND TART

And as no writing about pears would be complete without a recipe for a pear tart, here is one that my sister, Barbara, has used over the years. It originally appeared in Cook's Illustrated.
I am particularly fond of this recipe as it combines pears with one of their most natural and traditional complimentary flavors, almonds. This recipe although lengthy, is actually quite simple and so very, very delicious.

Not all pear tart recipes begin by poaching the pears, but a significant number of them do. You can decide for yourself what you like, but here is a basic poaching recipe for pears for this and other desserts. These pears sliced, by themselves, are delicious over ice cream, and the poaching liquid, if reduced to syrupy consistency is, as well.

POACHED PEARS

6 Peeled, halved and cored pears; Bosc or Bartlett;

1 Bottle of White Wine (I like Sauvignon Blanc)
1 Cinnamon Stick
4 Whole Cloves
2/3 Cup White Sugar
1" Segment of Vanilla Bean, split and seeds scraped into liquid
10-12 Black Peppercorns
Pinch Salt
Juice+Zest of 2 Lemons

Add all ingredients to a non-corrosive sauce pan and bring to a boil. Reduce the heat to a simmer and cook for 10-15 minutes. Place pears gently into poaching liquid and return heat to just short of a boil. Reduce yet again, and simmer pears until the can be pierced easily with a wooden skewer, but are not falling apart. Turn the heat off under the pan and allow the pears to cool in the poaching liquid.

This recipe calls for a classic Pate Sucree, or Pastry Dough, that incorporates egg, cream and sugar into a basic flour and butter mixture.

PATE SUCREE

1 Large Egg Yolk
2 TBS Heavy Cream
1/2 Tsp Good Quality Vanilla Extract
1 1/2 Cups All Purpose Flour
3/4 Cup Powdered Sugar
Pinch of Salt
1 1/4 Cubes of Unsalted Butter, very cold, cut into 1/2" cubes

Whisk together the egg yolk, cream and vanilla. Place dry ingredients in food processor and pulse briefly to bring together. Scatter the butter chunks over the mixed dry ingredients and pulse the processor several times (up to 20) to incorporate the butter into the mix. With the motor running pour in the wet ingredients and run machine for 12 seconds. Turn the dough out on to plastic wrap, form into a disc, cover and refrigerate for at least an hour (or more if necessary).

ALMOND FILLING (FRANGIPANE)

4 Oz. Blanched Slivered Almonds
1/2 Cup Granulated Sugar
Pinch Salt
1 Egg
1 Egg White
1/2 Tsp Good Vanilla Extract
1/2 Tsp Almond Extract
6 TBS Unsalted Butter, cut into 6 pieces, at room temperature

Pulse the almonds, sugar and salt in a food processor until powdered. Add the egg and egg yolk and the extracts and process. Add the butter in chunks and process until smooth. Scrape out into a bowl. Refrigerate if you are not going to use immediately.

ASSEMBLY

Remove pastry from refrigerator and roll out to about 12 inches. Lay over the top of a fluted tart pan and press the pastry down into it. Cover the filled tart pan with clear wrap and freeze for 30 minutes. Spray a sheet of foil with "non-stick" food spray, or brush it with cooking oil and lay it over the pastry. Fill the foil with rice or dried beans and bake at 375 for 20 minutes, rotating once. Remove from oven to cooling rack, gently remove foil and weights and allow to cool for 30 minutes.

If you have refrigerated your Frangipane, remove it from the refrigerator and whisk it a few times to soften it. Using a palette knife or a small plastic spatula, spread the Frangipane evenly and gently over the bottom of the tart shell.

Remove the pears from their poaching liquid and dry them very well on paper towels. Either slice them and lay them in a nice pattern on top of the tart; or, lay the whole pears on the filling, slice them and gently press them into place on top of the tart.

Lower the over temperature to 350 and put the tart in the oven on a baking sheet. Bake for about 45 minutes or until the crust is puffed, brown and crisp to the touch. Allow to cool on the baking sheet. If you wish to glaze the tart, heat about a 1/4 cup of a clear jam like apple until it liquifies and brush it gently over the top of the pears.

Allow the tart to cool for two hours. If you have used a ringed tart pan, remove the outer ring at this point, cut the tart into wedges and serve.


Wednesday, October 12, 2011

PUTTING IT BY

We are in the process, at our house, of (nearly) desperately trying to capture lightning in a bottle. Or, more realistically, preserve some of the tastes and memories of a summer that wasn't nearly long enough. Same thing, I guess. In any case, we are filling our freezer and cupboards with stacks and stacks of bags (thank God for zip-locks) filled with goodies that will help us to get through a long and rainy winter of tasteless vegetables and virtually no, good fresh fruit.

I have never really been a preserving, canning, drying, jarring (well, I can be a bit jarring) kind of guy. I've always worked in restaurants and being in that position can easily create the illusion of plenty. Sure there are no more asparagus, but we're going into green bean/snap pea/hell, brussells sprout season. Or, what, no peaches? Okay, we'll change that recipe up and do it with pears, or mangoes, or papayas or something. This is just the way it is in the restaurant biz, particularly when one is working in, or is close to an urban center (or better yet, living in the tropics where things just GROW).

But now things are different, far different. Kathy and I live at the Eastern edge of the Willamette Valley, nearly 25 miles from Salem, the nearest "large" city, and hardly an urban center. Even the "good" grocery stores here are not exactly hotbeds of produce bargains and while during the harvest season it is possible to eat locally, most of the food here comes from far, far away. Our summer here lasted about six weeks and we are at the tail end of a growing season that gave us late season tomatoes and squashes, but now is down to apples, pears, cauliflower and cabbage.

When I got here at the end of last winter I saw green beans for sale in the local supermarket for as high as $3.49/#, and the cheapest thing around was broccoli at $1.99/# and oh boy, did we ever get tired of broccoli. So our answer was to blanch and freeze as many of the green things as we could and we've now got bags and bags of our own homegrown beans and peas flash blanched and safe in the freezer. Sadly, I've got to admit, we absolutely BLEW through our own homegrown broccoli; what a difference!!

When it came to tomatoes we were of two schools of thought. Kathy is a dryer and she is the undisputed Queen of the Dehydrator (more about that later). As a result, we have several bags of dried tomatoes ready to contribute their concentrated flavors to everything from salad dressing to pesto to sauces.

I, on the other hand, am a freezer, and to me this means getting those tomatoes into a frozen state so that they are ready to contribute flavor immediately. I like roasting halved tomatoes in a hot oven (425 or so) along with sliced onions and whole garlic cloves on sheet pans in olive oil until everything is just taking on the edge of caramelization. The cooled and concentrated product is then rough-chopped and stored, flat, in ziplock bags. And we now have 12 large ziplocks filled with roasted concentrated tomatoes in the outside freezer. I will use these in braises, bean dishes, soups and any number of other applications. The only caveat is if we lose power and the freezer goes down.

Also helping to fill up the outside freezer are 20# of frozen local blueberries, 12# of frozen local raspberries and a couple of ziplocks each of peeled and chunked peaches and nectarines. And yes, the Willamette Valley does surprisingly well in the peach and nectarine department. I pretend that some of these fruits will end up in pies or crisps or cobblers, but truth be told, they lay in wait for several months worth of my morning smoothies. I use bananas and yogurt as a base, but the real flavor comes from the berries. My mornings are not complete without them.

Right now the previously mentioned dehydrator (and I can here it doing its slow turns right now) is filled with thin slices of Willamette Valley Bartlett pears, doing their drying out thing. Kathy brought home a 42# lug of the beautiful ripe fruit and she is doing her utmost to make sure that we have at least the taste, if not the whole effect, of those sweet pears all winter long. Her regimen involves peeling, coring and slicing and is indeed a labor of love. Last winter while I was still in Costa Rica she sent me several bags and I fell in love with their minerally and slightly grainy texture and their sweet expression of pure pear flavor. And now that the Bartletts are done, dried and in their bags, we're going out for a lug of Bosc. One can really never have too many dried pears.

Our last mission in the process of putting food by will be the last harvested vegetable in this valley, cauliflower. These too, will be flash blanched in boiling salted water and frozen. Fortunately I've found a woman who loves cauliflower as much as I do and we've both been watching the fields right near our house with great anticipation of the harvest.

I made the Fall's first cauliflower gratin early this week and it was wonderful, but even more, I love simply tossing big chunks of florets (1/4-1/6 head or so) in olive oil and sea salt and simply roasting them in the oven. I never, ever got passionate about cauliflower until I ate it this way. It is an amazing expression of pure cauliflower goodness, but if you feel like sprinkling a little grated Reggiano Parmesano over it just as it comes out of the oven, I certainly couldn't fault you for it.

And as much as I would like to think that this frozen and dried bounty is going to take us through the winter, I know better. Sadly, most of this will be eaten within the next three months leaving us, somewhere in the middle of January or so wandering the aisles of the supermarkets eying over-priced and underloved produce from far away. Kathy will hate me for saying this, but we'll just have to make the garden bigger next year.

As much as I would love for this frozen and

Sunday, October 9, 2011

So Many Years of Sausage

In recent days I have become reacquainted with a kitchen passion of mine, sausage making. After a bit of cajoling from their new Chef (me), the owners of Willabys have bought the grinder head we needed to complete our Hobart mixer and I am in business. Not only is owning a grinder a good move financially, it opens up a whole new arena for charcuterie on our catering menus.

There is nothing difficult about making sausage. Oh yeah, you do need the right equipment; grinder, stuffing cone, a few different sized dyes (they determine the size of the grind), and a smoker should you so desire. And you do need the right supplies; meat, fat, spices and the casings. Naturally, and lastly, it goes without saying, you need the interest, the desire and ultimately the passion for doing it right.

Sausage making doesn't convey the art of so many other parts of the culinary world. It is essentially taking the bits of meat that aren't wanted for anything else, grinding them up and shoving them tightly into a pig's intestine. There are jokes about how one doesn't want to see sausages being made and other unkind and untoward remarks on the subject. However, when you place a wonderfully made and perfectly cooked sausage in front of most people, the level of happiness and satisfaction is unrivaled. Sausages are simple yet remarkably flavorful and represent the one of the most basic and joyful relation people can have with food.

Thirty years or so ago, I was one of those cooks who had never seen sausage being made and I gazed, no gaped, in wonderment as we actually ground our own meat and stuffed into casings our very own selves at the 4th St. Grill in Berkeley. And not only that, we made two types which we affectionately called (in the kitchen, anyway), red dogs and white dogs. The red dogs were all pork with a mix of dried red chiles and the white doggies were pork and chicken seasoned in a southwesterly (as my Indian friend Anthony used to call it) direction with fresh green chiles and cilantro. It was here in Mark Miller's kitchen that I first grasped the concept and the technique for making sausages and it remained with me, although somewhat deeply imbedded.

I made a few stabs at sausage making up in the Napa Valley and even turned out what was a pretty decent Moroccan spiced lamb sausage while working for the California Cafe Corp. I went down to LA to help a friend of a friend open a restaurant called Gilliland's in the summer of '84 and I ran into the Venice Beach sausage king, Jody Maroni. He had been content vending sausages he was buying, the usual Coney Island, Kielbasa, etc, and over a grinding machine at his uncle's butcher shop and a small payoff, I showed him a number of different styles of making fresh sausage. He now has a sausage kingdom.

I moved back up to the Bay Area and became Executive Chef at Tourelle in Lafayette, CA, where we made a few different types of sausage, but the one I remember best was the Duck Pepperoni. I ended up on Cape Cod for a summer season shortly after Tourelle closed for major renovations and representing the Ocean Edge Resort, we knocked the socks off a tasting event on the Cape with a variety of sausages, including Duck with Roasted Garlic and another version of the Moroccan Lamb Sausage (with plump currants and plenty of cumin).

In 1990 I found myself as the Chef at an unlikely and very early champion of "American Regional Cuisine" called the Mackinaw Inn in North Lake Tahoe. We were way ahead of our time and most of Tahoe was still stuck in the Steak and Lobster phenomenon of the 70's, but we forged ahead nonetheless, with a kitchen built around a mesquite grill, a giant wood-burning rotisserie and a wood-burning pizza oven.

At the Mackinaw we cut and cured our own hams (and this was 1990, remember, way before it was hip to do "whole animal butchery"), roasted whole chickens, lamb legs and the hams over the rotisserie in front of the dining room and made yes, countless sausages and even our own hot dogs (for the bar menu). I couldn't have done any of this without my friend and sous-chef Jim Miller wielding his razor sharp butcher knives, and we nearly drove ourselves crazy trying to keep up with making game sausages by boning out pheasant hind-quarters, a fat-free chicken sausage and three or four different kinds of pork sausages, utilizing the by-products which the pig so generously gives. And oh yes, we perfected the hot dog.

Tahoe was not for me, nor was I for Tahoe, and I returned to San Francisco to try to make some headway into what was, for me, the Mecca of restaurant life. I started off as a sous chef at Embarko, a brilliant shooting star on the Embarcadero that flared out far too early, and after a couple of low level Chefs jobs, found myself, in 1994, at San Francisco's bastion of Creole/Cajun cuisine, The Elite Cafe. The Elite was still packing them in by blackening redfish, filets and anything else they could find, but the allure was running thin. I was hired, essentially, to drag the place kicking and screaming into the 90's and to give it some kind of connection with the direction food in San Francisco was going.

We didn't muss and fuss with the menu all that much, but instead added specials; lots of them. And one that I added that became a hit and got me back into my sausage making ways was a "fat-free" spicy smoked chicken sausage that we made right there in that tiny little kitchen. The recipe was delightfully simple: boneless chicken legs, skin and all; heaping piles of thrice (yes thrice) blanched garlic, mustard seeds and red chile flakes; all ground together and stuffed into a casing. And that was it. The garlic served as the binder and the only fat in the dish was the not insignificant amount contained in the chicken skin.

We stuffed the sausages on a grinder that was crammed into a back corner of the kitchen at the end of a narrow aisle-way that was the only path to the downstairs (where most everything was stored) and somehow managed to find the time and space to crank out about 200 "bird dogs" a week. We also devised a method of smoking them which involved turning off the oven pilots, setting wood chips afire over the stove burners in saute pans, and heaving the smoking pans into the ovens where the sausages had been placed on racks. It was madness and it was, in its own funny way, brilliant. We served two of the grilled smoked "bird dogs" over creamy polenta topped with a roasted tomato-mushroom ragout.

I left the Elite after nearly three and a half years, my longest tenure ever as a Chef anywhere, for another position in another Creole/Cajun style kitchen. This time, however, rather than inheriting an operation that had been up and running for 14 years (and found change to be uncomfortable) I would be writing my own menu, creating my own recipes and even naming the place myself. The owners of Cobb's Comedy Club, passionate New Orleans diners had made me an offer too good to refuse and I jumped.

Jumping along with me to Belle Roux (the name I'd suggested that was adopted) was my recipe for the "bird dogs", but now I had the opportunity to do something I had wanted to try all along, which was create a smoked Creole "style" sausage of my own. I had been quite happy using Hobb's venerable Andouille sausage for all of my "red" pork sausage needs (jambalaya, gumbo, etc...), but I wanted to make my own, to see what I could come up with creating my own recipe. Frankly, it was a huge success. Both of the subsequent reviews of Belle Roux mentioned the rich spicy smokiness of this sausage and I even posed for the photos accompanying one of the reviews with garlands of sausages wrapped around my neck and arms.

It was here, at Belle Roux, where I had reached my highest peak yet with sausage. I was making over 150#'s a week of two sausages, both my own recipes; I was featuring the two of them in our best selling appetizer, a sausage "sampler" and I was using the Creole style pork sausage successfully in both our jambalaya and our gumbo, as well as featuring it, grilled, over red beans and rice. Best of all, Hobbs Shore, a man I considered a "guru" of sausage and meat curing had even asked me for my chicken sausage recipe. Hot dog!!

But the restaurant business is a funny animal, and I found myself moving along again and leaving my passion for sausage making behind until now, at this most recent (and hopefully long term) stop at Willabys Catering. It seemed to me that in this Pacific Northwest environment homemade sausages as both an appetizer and in pastas would be a winner.

Additionally, it seems that no one in our Salem/Willamette area is doing anything remotely like this and the potential exists for us to perhaps take our dogs to the public and see if we can generate some interest. I do hope so. My excitement for sausages has been re-kindled after having been kenneled for so long and I can see that it may be something that brings us acclaim above and beyond our catering.

Tuesday, October 4, 2011

CHEFS NIGHT OUT

Chefs Night Out

This Sunday past was the Chefs Night Out benefit for the Polk and Marion county Foodbanks at Willamette Valley Vineyards, just outside of Salem. As any of you who have attended one of these events know, a donation is made, a wine glass and plastic plate are offered and the feeding and drinking frenzy is on. This particular rainy afternoon we shared the main tasting room (and outside tent in our case) with 17 other restaurants/caterers and 18 wineries.

The general battle plan for a company such as ours is to prepare a massive amount of "bites" or "tastes" (in our case 850) which can be easily transported and assembled on site. In the past I have tried to do more ambitious productions and it has never ceased to cause complications. Simple is better; simple and good is best.

Since we are just at the tail end of a great season of local sweet corn, I decided to feature Willamette Valley corn, grilled and made into little corn pancakes. Our topping would be a bit of corn (grilled again) and black bean salsa and we would top it all off with a dollop of roasted poblano chile/cilantro sour cream. Simple enough, but still no simple operations when one is trying to run a busy catering kitchen around putting together 850 hor's d'oeuvres.

The Saturday before the event we had two lunches that needed to be delivered along with buffet dinners for 66 and 125 that evening which were, fortunately at the same location, the aforementioned Willamette Valley Vineyards. Naturally there was a whirlwind of prep going on for the Saturday events and there were stacks of produce boxes, rolling racks, plastic-wrapped platters and prep tables heaving with veggies, meat and chicken all being prepped. Despite all that, we did manage to set up the propane grill out in the parking lot and grill off the three donated cases of corn, 144 ears. When you passed by you could hear them popping merrily on the grill grates.

When we loaded our two vans Saturday afternoon and set off to serve our dinners we felt as if we were in good shape for Sunday's event. The corn was grilled and a plan was set. Now we just had to serve dinner to 200 or so.

Pedro, Adam and I straggled back in Sunday morning after our long Saturday and while I started cutting the kernels off the 144 grilled ears of corn, the two of them put together yet another two parties that were to go out by noon; ahhh, catering.

My plan was to first put together the salsa, a simple concoction of the grilled corn kernels, cooked black beans, roasted red pepper and a couple of handfuls of chopped cilantro in an orange/chipotle/cumin dressing. Simple enough yes, although one does forget how long it takes to strip the ears of their tasty kernels. I tend to favor laying the cob down on the table to cut rather than standing it on end as it seems to leave the cut parts of the corn on the cutting board, rather than firing them around the room.

Once the salsa (almost a salad) was assembled it was time for the pancake batter. I used a recipe I like that incorporates the corn into a mix of cornmeal, cumin (again), finely minced jalapeno and a bit of green onion. Into that dry mix goes a wet solution of Greek yogurt, egg yolks and olive oil. The final step is whipping the separated egg whites and then folding them into the entire mixture. This gives the pancakes a nice little "rise" when they hit the griddle.

CORN PANCAKE RECIPE

1/2 Cup fine grind cornmeal
1 1/4 cup Cooked corn kernels
3 Green onions, sliced as thinly as you can
1 Jalapeno, chopped fine
1/2 Tsp Cumin (seeds toasted, then ground)
S&P

3/4 Cup Greek yogurt (I prefer the full fat rather than the low fat)
3 Egg yolks
1 1/2 TBS Olive oil

3 Whites separated and whipped to light peaks

Mix dry ingredients together and mix wet ingredients (omitting the egg whites) in separate bowls. Mix the wet into the dry and then fold the whipped egg whites in, just to incorporate.

Heat a skillet and lightly brush with oil. When it is just short of smoking, drop the pancakes onto the skillet off the end of a teaspoon into small circles; pat down into pancake shape. Fry on one side and then turn.
~~~~~~~~~~~~~~~~~~~

Mixing the batter in large quantities was, of course, a bit messier than I'd intended, but the batter came out nicely. It always seems a bit denser than I expect, but that is from the quantity of fresh corn that I use (I tend to err on the side of using more than less corn). I found that by multiplying this recipe eight times, I got just over 400 pancakes from it (not counting the ones that didn't quite make it in the pan due to bad flipping technique).

Since, sadly, we do not have a flat grill, which would have made this child's play, I hauled down our big cast iron skillet and heated it up. This particular skillet is on the thin side so the heat needs to be constantly adjusted, another caveat I had failed to factor in. And so the production began. It took me about an hour on my own, then Pedro joined me, using a smaller pan, and we stood and panfried our 850 corn pancakes in just over two hours. We laid the cooked cakes out onto sheet pans and then re-heated them in the oven just prior to leaving. We packed them into smaller pans and put them into a Cambro, an insulated plastic box.

Adam had packed the salad/salsa for us and had put together the sour cream sauce by pureeing the roasted chiles and two bunches of cilantro in the Cuisinart with a couple of cups of sour cream. The van was packed with the Cambro, the salad and the salsa and we were ready. Pedro and I had our black chef's coats, a big stack of business cards, plenty of bottled water and miraculously we were on time and off to "Chefs Night Out".

We'd heard a rumor that we were going to be stuck in the satellite tent outside the main room and sure enough, that was the case. Our table had been decorated quite nicely by Sue, who does a lot of our event staging and all we had to do was haul in our Cambro, the beautiful copper platters we'd chosen and a few bowls. This was the point where I was ever-so-glad we had decided to go simple. I watched other caterers struggling with chafing dishes, lighting sterno and hunching over cutting boards in frenzied last minute prepping; ugh. Not for us; no way, no how.

Pedro and I put on our coats, assembled a couple of trays of the pancakes and stepped back. We were in a corner of the tent between two wineries and that was just fine. It was a bit misty outside and chilly, but the main room was going to get packed and stifling. This was better.

The first wave of guests had VIP passes and got to arrive an hour earlier than the teeming masses. It was all quite civilized and there was time to chat a bit with our visitors. People were leaving their cars in a big parking lot at the bottom of the hill (the winery sits atop a beautiful peak that looks out over the Willamette Valley) and being shuttled up which allowed for a good flow of guests, at least early on.

After the first hour the crush set in and the feeding and drinking began in earnest. There is a certain type of person who comes to events such as these to see just how much he can slug down his throat and cram into his mouth and there were plenty of these guests in the second wave. The tent filled, the musicians turned up and the volume swelled. Blessedly, this is when the time seems to fly and Pedro and I concentrated on traying, topping and saucing our little cakes.

The two middle hours flew by and we went through our product in a fairly predictable way. I was relieved to see that we were definitely going to have enough and not suffer the indignity of running out early. The final hour of events like this are, unfortunately, generally dominated by those who just can't bear to leave, need to have just one more (or three more) glasses of wine and who tend to stand in clusters and shriek and scream. This is the point of the festivities when the wineries start pouring larger and larger glasses (generally due to customer demand) and the drinkers seem to dominate the proceedings.

Pedro and I packed up as best we could, gritted our teeth through our painted on smiles and kept replenishing the trays, although not much eating was being done at this point. As the blessed hour of 7:00 drew closer, we packed up everything we could and began to plan our escape. I sent Pedro for the van about quarter of the hour and it was, nearly over. It had been a success, we had garnered much praise for our little pancakes and had gone through nearly all our product. The day was long, but the getting was good and we splashed down the winding winery driveway through the raindrops and puddles, tired and ready for the barn. I was quite glad that we were a few minutes ahead of the final drinkers who would hit the roads all too soon...


Wednesday, September 28, 2011

AND JUST LIKE THAT

And yes, it was "just like that" that the warmth and generous spirit of Indian Summer were supplanted by a howling wind and sideways rain, last Saturday night. No messin' around here on the eastern edge of the Willamette Valley; when Ma Nature tells you that Indian Summer (and any and all summer you may have hopes of hanging on to) are over, they are over.

But please, please, please don't get the idea that we weren't/aren't ready for it. That's hardly the case. Here on the home front we've filled the woodpile with 4 cords of of firewood, harvested most of the garden and canned, roasted, dried and frozen just about everything that could possibly be of some use in the coming months of chill.

We have made the short drive back and forth to Ted Hazel's massive woodpile (he's a local woodcutter) in the White Buffalo, our 1990 Chevy Cheyenne pick-up with load after load of firewood. We'd pick it up at his place and hurl (or occasionally neatly stack) it into the bed of the truck then drive it up the hill here to our house where we once again hurl it out onto the lawn in preparation for the meticulous stacking process. This wood gets handled a lot.

I'm new at this, but Kathy has a plan and a system, and it's a good one, involving building strong corners using half logs and then stacking and arranging the rest in between. We've managed to get 4 cords of wood stacked into a relatively small area and it's pretty damn impressive. Just one cord of wood is, as I have learned, 4 feet by 4 feet by 8 feet, or, 128 cubic feet, and that's a lot of wood. Multiply that times four and you get a big old (neatly organized) pile of wood.

Each of our runs over to Ted's netted us about 1/4 of a cord, so there were 16 trips and then a number of afternoon stacking parties to get all this fuel into place. We heat our house with a wonderful old cast iron stove and it beats the heck out of paying a $300 month electrical bill, no matter how tired one gets of hauling and stacking firewood.

And just past the woodpile is the garden, which has been very nearly picked clean. Our early crops were potatoes, onions and garlic, all of which were picked and stored in the shed last month; but the most recent harvest has been tomatoes, green beans, peppers and a few squash.

If you'd asked me a month ago whether or not we were going to have ripe tomatoes, any ripe tomatoes, I would have had to tell you no, I didn't think so. All it took was three hot weeks from the end of August into the second week of September, and we've got almost more red, ripe tomatoes than we know what to do with, BUT, the good news is, we do know what to do with them. Kathy is a drying expert and we now have ten or twelve giant zip-locs filled with dried tomatoes for winter sauces and stews.

My preferred method of storage is a newer one that I developed a few years ago when trying to wrench flavor out of winter tomatoes while working in San Francisco. My technique involves pouring olive oil on a sheet pan, placing cored and halved tomatoes on it (cut side down), layering thick slices of onion and whole cloves of garlic in and around the tomatoes, pouring on more olive oil and then salting and peppering. The tray of tomatoes is roasted in a 400-450 degree oven until the tops blister and then removed and allowed to cool. I rough chop the roasted tomatoes and store them and all their luscious juices in yet more zip-locs. The tomatoes get a tremendous concentration of flavor (thus, my having used this technique on flavorless winter tomatoes) and can be used for pasta sauces, or added to braises and stews for more flavor. I love this technique.

We have eaten as many green beans as we could possibly shove into the front of our faces, and now they just get quick blanched and frozen for winter usage. We used the same technique for an earlier harvest of peas and now have four bags full. Kathy freezes chiles whole and it seems to be a pretty good idea. We have zip-locs filled with anaheim, poblano and jalapeno chiles stored in the freezer for future reference. There are still Walla Walla onions to be pulled and a scant number of pumpkins "oranging" in the last of the September sun. We had some kind of funky fungus that got to most of our zucchini, but then again, that may have been more a blessing than a curse. And last week we ate our last head of romaine so despite there not having been any summer at all until early August, I think we did pretty damn well.

Tuesday, August 16, 2011

Summer Upon Us (and summer not)

We've almost come to the end of August here (and everywhere else, I can only presume) and it has become plain that this is all the summer those of us here in the Willamette Valley are going to get. We just got that burst of summer that everyone was looking for, temps in the low 90's (that would be fahrenheit, natch) and lovely warm evenings, but it only lasted four or five days. Just as quickly we've reverted to gray misty mornings and overnight temps in the 50's (we put a quilt on the bed last night) and today it even had the nerve to rain; a slow steady rain that's still coming down, while I was out stacking firewood. It's odd, or so they tell me, but I'm thinking this may just be a new part of the ever shifting weather paradigm.

The Willamette Valley is a major agricultural area and provides employment to nearly 225,000 people annually. There is a huge harvest of vegetables of all kinds, wine is, of course, becoming a big factor economically, but the Willamette Valley produces more exported berries, hazelnuts and wheat than any other agricultural area of the United States. Additionally, the Valley is home to a huge production of the famous Cascade hops, prized among beer makers for the distinctive bitterness they bring to the brew. Spread between the veggies and berries are the biggest agricultural cash crop of all, commercial growing for nurseries. There are hundreds of acres of land filled with potted shrubs, trees and flowers looking for a nursery in a neighborhood near you.

Summer didn't begin to give our valley much in the way of sunshine and support until mid-July and suddenly here at the end of August the entire area is nearly done with the seemingly spontaneous burst of energy of farmers and workers scrambling overtime to get the crops picked and packed in less time than usual. The strawberries and raspberries are pretty much done, there is still a final harvest of blackberries and blueberries going on and I must confess, they are among the best I have ever eaten anywhere. My esteem for raspberries in particular had fallen mightily since they became a nearly year round crop (thanks to Peru and down under), but this summer I have eaten raspberries grown right down the road that have made my jaw drop; fat, succulent and filled with flavor (as opposed to the pebbly, dry and flavorless berries that are passed off on cruiselines and hotel buffets year round).

I just picked up some peaches that were grown between here and Albany that rival most of those I've had from California and at the same farm they had four different types of heirloom varietal melon, including a Charentais, the French cantelope. The aroma in the truck emanating from the peaches and those melons as I drove home was heavenly. Back when I arrived here in March I would never have believed that produce this sweet and this ripe would come from an area so cold and damp.

~~~~~~~~~~~~~

Because I have spent my entire life in restaurants I have always been the beneficiary of other gardens and other gardeners. I began using local produce grown in Brentwood by David and Laurie Visher at T.R.'s Bar and Grill in Concord, CA, way back in the summer of 1985; bought produce from local gardens at Tourelle in Lafayette in the late 80's; and got "same day as picked" deliveries of amazing heirloom varietals from Summer Fog produce, George Gutekunst's tiny outpost in the fogbelt of San Francisco's Avenues in the 90's.
It used to be that chefs in cities used to have to really want to do the work to locate and serve farm fresh produce. It's only recently, and I'm talking the last 10-12 years or so that chefs and restaurants have been able to offer produce that has come out of the ground that day or at least, the day before.

And now cooking for just Kathy and myself, I'm getting the opportunity to use the product right as it emerges from the earth. Green beans to pot in three minutes and on the table in ten; what a concept. And the flavor, whew, remarkable!! It's a whole new thing for me to be able to use produce that comes right out of my backyard. Kathy did nearly all the work this past Spring, but I did run the tiller and did a fair amount of weeding. I didn't realize just how much I was going to enjoy reaping the benefits of her (and a bit of my own) hard labor.

Our own garden started slowly, but has suddenly sprung into production, catching us a bit unawares and not quite ready with a plan for the bounty. A few weeks ago we dug our first potatoes and a seed plot of tiny reds yielded us between 50-60# of beautiful firm red first crop
potatoes; small, medium and large. Last week we dug up the smaller harvest of yukon golds, getting another 30#s or so out of the rich (20 years of horseshit, Kathy tells me) soil and another 10# of delicious red fingerlings. The medium sized potatoes are wonderful roasted simply in a bit of olive oil, sea salt and fresh cracked pepper. I've also been making a French-style potato salad with plenty of Dijon mustard and red vinegar that has all who have tasted it saying, "the best I ever had". I'd like to take credit, but it's all in the potatoes.

We pulled up all the fragrant members of the lily family this past weekend and now have bags of onions, shallots and long stems of garlic hanging in the shed for winter use. The garlic in particular is strong, odiferous and such a pleasure to use so very fresh. We got a major haul of green beans and although as I mentioned, I delight in cooking them to al dente 1o minutes out of the garden in butter and shallots, this past weekend we had a gathering of Kathy's family and by request I did them the way her mom and my mom used to, slow cooked, with bacon and onions. What a world of difference in flavors, though; tender, delicious, and consumed, every last one!

We've eaten all the peas, they were fabulous, sweet and crunchy, but lots of ground work and shelling for such a small yield. This is a big broccoli producing area and we had a small harvest of our own. When we cut the florets, they were so damn fresh they were almost a glowing blue-green color. And the flavor was otherworldly as well. We've had a bit of a blight on the summer squash, a root fungus or something, but there are still enough (and thank God, not too many) zucchini and crooknecks to saute a night or two a week or to offer themselves up to my own version of ratatouille (one in which I cook each of the ingredients separately and then mix them).

We're still looking forward to another harvest of lettuce, one more of peas and the remainder of the beans and squashes. And oh, yes, the corn, the tomatoes and the celebration of the season at the Harvest Fest in Mt. Angel. There are pears and apples still to come; carrots and peppers and pumpkins, and did I mention the corn? So yes, fresh from our garden and fresh from this valley have been revelations to me in this, my first Oregon summer.

Wednesday May 13, 2009 La Cusinga and Me


This words below are from our website describing La Cusinga.  The story, however is much deeper and much richer than these introductory words can describe.  La Cusinga represents a noble and successful effort to preserve this section of unspoiled coast and to keep it alive as a model of what true ecology can accomplish.  The dreams and visions of John Tresemer, the owner of La Cusinga and the Finca Tres Hermanas that surrounds it, have been realized here in what is a true example for all who would preserve and protect what remains of this, or any natural wonder. 

La Cusinga 
La Cusinga Lodge is a coastal rainforest eco lodge dedicated to marine and terrestrial conservation and environmental education. Its location on the southern Pacific coast provides guests with sweeping ocean views and a relaxing beach vacation. In addition La Cusinga is part of a private nature reserve that supplies the visitor with an unparalleled look at Costa Rican wildlife and rainforest. The reserve consists primarily of 250 hectares of virgin rainforest that borders thousands of more acres of privately protected forest. On Costa Rica’s still wild south-western Pacific coast, La Cusinga Lodge borders Ballena Marine National Park which was developed to protect the humpback whales that frequent the coast. La Cusinga Lodge was established in order to share the unique site with Costa Ricans as well as international visitors. Besides getting exposure to rural Costa Rican culture and beautiful vistas, visitors have access to highly prolific areas of primary tropical rainforest and unspoiled coast, all conveniently accessible. 

i returned to La Cusinga this past January, 2009, with a dream in mind.  I wanted to create a cuisine for our guests that would bridge the gap between what La Cusinga offered physically and spiritually, and what they were putting in their bodies when they ate here.  I knew from having previously lived in Costa Rica for over two years that there were organic farmers and that sustainable agriculture was being practiced, but at that time it had been limited in its scope as well as its distribution.  

My first steps upon returning were toward the local Feria to seek out and communicate my ideas with the growers and vendors who could provide me with a local, organic and sustainable product.  The fertile valleys of San Isidro that lie over the coastal mountains and to the Northeast of our Pacific location are rich and productive but are only now exploring the potential that they hold.  

I had in mind a vision that would support local farmers, fishermen and food artisans and one that would recreate (or perhaps, create) a new cuisine of Coastal Costa Rica.  I visit the markets each week to talk with growers and to develop the  relationships that I believe will be mutually beneficial as Costa Rica experiences its rapid growth on an international level
.
Organic farming is a new and not heavily supported concept in our part of Costa Rica.  It is a brave step for farmers to make, as local communities of both growers and consumers have never placed, or not known to place, an importance on farming organically and sustainably.  I feel a responsibility as a Chef here to be at the forefront of those encouraging and supporting these pioneers  

I came to La Cusinga almost three years ago not knowing what to expect.  My first time through here was characterized by a lack of understanding and appreciation on my part as well as an inability to recognize or connect with the local "flavor" that would make for a coherent package for out guests.  I now feel as if I have made a "connect" with the property and the vision.  I am not completely satisfied and hopefully, never will be, until we are able to produce, right here at La Cusinga, the greater share of the produce we serve.  However, the groundwork has been laid with local farmers and the availability and quality of organic produce is impressive.

Now at La Cusinga I serve a variety of organic lettuces and braising greens.  My salads include wedges or slices of rich red tomatoes as well as sweet !00 and yellow pear cherry tomatoes.  I roast organic beets and marinate them in balsamic vinegar to be served alongside the lettuces and topped with a locally made organic goat cheese.

My soups are made from roasted and steamed local organic vegetables and tiny organic yellow creamer potatoes have found their way onto my plates, nestled against filets of locally caught fish.
I am now using a local organic cocoa powder that still contains the nuggets of cocoa butter unlike the fined cocoa powder in the markets.

And better still, I am able to use palmito (hearts of palm), ginger, cilantro and its sawtooth leafed cousin culantro coyote, mangoes, hot and sweet chiles, mandarina limes and yucca root from our own Finca Tres Hermanas to serve in my dining room at La Cusinga.   The connection from jungle and farm to table is evolving.  May it continue to grow.